
I’m not a front-end coder. I prefer the back-end. So when I heard that there was a new front-end scripting language, PyScript, based on python, my back-end programming language of choice, I was curious. Would I now be able to create interactive front-ends with my existing python knowledge? I had to give it a try. Now, every front-end needs a back-end to talk to, and it just so happened that I’d just built a whole API… so for my first experiment, I thought I’d try creating a front-end page with PyScript that logged in to my python API (i.e. retrieved a token from the /token endpoint). What follows is the result…
Prerequisites
I’m using the FastAPI API for my backend, as demonstrated in my Creating an API with python series. If you want to use that too, you’ll need to set it up locally. See https://github.com/liz-allthecoding/taglink-api.
Step 1: Add an html directory
On my local virtual machine, I created a new directory to contain the html page:
$ sudo mkdir -p /usr/share/html/web
Step 2: Update the nginx config
I then updated my existing nginx config for the FastAPI api, adding a /web location:
-
$ sudo su
$ cd /etc/nginx/conf.d
- I added this snippet to
api.conf:location ^~/web/ { root /usr/share/html; } - The whole file then became:
server { listen 443 ssl http2; listen [::]:443 ssl http2; server_name _; ssl_certificate /etc/ssl/certs/server.crt; ssl_certificate_key /etc/ssl/certs/server.key; ssl_session_cache shared:SSL:1m; ssl_session_timeout 10m; ssl_ciphers HIGH:!aNULL:!MD5; ssl_prefer_server_ciphers on; access_log /var/log/nginx/nginx.vhost.access.log; error_log /var/log/nginx/nginx.vhost.error.log; location ^~/api/ { rewrite ^/api/(.*)$ /$1 break; proxy_pass http://127.0.0.1:8000; proxy_set_header Host $host; proxy_set_header X-Real-IP $remote_addr; proxy_set_header X-Forwarded-For $proxy_add_x_forwarded_for; proxy_set_header X-Forwarded-Proto $scheme; proxy_set_header X-Request-Id $http_x_request_id; proxy_set_header X-Cert-Issuer-DN $ssl_client_i_dn; proxy_set_header X-Cert-Subject-DN $ssl_client_s_dn; } location ^~/web/ { root /usr/share/html; } } server { listen 80; listen [::]:80; server_name _; return 301 https://$host$request_uri; } -
I then restarted nginx:
$ systemctl restart nginx
Step 3: Create the HTML Login Page
The login page first consists of a simple html form with minimal styling.
- I created a file called
index.htmland add it in the/usr/share/html/webdirectory with the following contents:<!DOCTYPE html> <html> <head> <meta charset="utf-8"> <meta name="viewport" content="width=device-width, initial-scale=1"> <title>FastAPI Login</title> <style> .hidden { visibility: hidden; } .visible { visibility: visible; } </style> </head> <body> <div id="login-form" class="visible"> <p>Please enter your login details</p> <p>Email: <input id="email" type="text" placeholder="joe@blogs.com"></p> <p>Password: <input id="password" type="password"></p> <button>Login</button> </div> <div id="login-success" class="hidden"> <p>Login successful!</p> </div> <div id="login-failed" class="hidden"> <p>Login failed!</p> </div> </body> </html> -
I then added links to the PyScript styles and code source.
<link rel="stylesheet" href="https://pyscript.net/alpha/pyscript.css" />
  <script defer src="https://pyscript.net/alpha/pyscript.js"></script>
-
Next, I added the PyScript functions for an “on click” event and for calling the API (note I replaced
<MY_IP>with my server’s IP):from pyodide import create_proxy async def on_add_click(event): email = document.querySelector("#email") password = document.querySelector("#password") if email.value and password.value: token = await loop.run_until_complete( login(email.value, password.value, "admin") ) print(token) if token is not None: if token != "Error logging in": p = document.getElementById("login-success") p.classList.replace("hidden", "visible") p = document.getElementById("login-failed") p.classList.replace("visible", "hidden") p = document.getElementById("login-form") p.classList.replace("visible", "hidden") return p = document.getElementById("login-failed") p.classList.replace("hidden", "visible") p = document.getElementById("login-success") p.classList.replace("visible", "hidden") button = document.querySelector("button") button.addEventListener("click", create_proxy(on_add_click)) # Run this using "asyncio" import json import urllib from pyodide.http import pyfetch from pyodide import JsException async def login(email, password, scope): headers = {'Content-Type': 'application/x-www-form-urlencoded', 'accept': 'application/json'} body_dict = {"username": email, "password": password, "scope": scope, "grant_type": "", "client_id": "", "client_secret": ""} body = urllib.parse.urlencode(body_dict) try: response = await pyfetch( url="https://<MY_IP>/api/token/", method="POST", headers=headers, body=body ) if response.ok: data = await response.json() return data.get("access_token") except JsException: return "Error logging in"Note that this is a strange hybrid mix of python and javascript. Meet PyScript! -
Finally, putting it all together:
<!DOCTYPE html>
<html>
<head>
  <meta charset="utf-8">
  <meta name="viewport" content="width=device-width, initial-scale=1">
  <title>FastAPI Login</title>
  <link rel="stylesheet" href="https://pyscript.net/alpha/pyscript.css" />
  <script defer src="https://pyscript.net/alpha/pyscript.js"></script>
  <style>
    .hidden {
        visibility: hidden;
    }
    .visible {
        visibility: visible;
    }
  </style>
</head>
<body>
  <div id="login-form" class="visible">
    <p>Please enter your login details</p>
    <p>Email: <input id="email" type="text" placeholder="joe@blogs.com"></p>
    <p>Password: <input id="password" type="password"></p>
    <button>Login</button>
  </div>
  <div id="login-success" class="hidden">
      <p>Login successful!</p>
  </div>
  <div id="login-failed" class="hidden">
      <p>Login failed!</p>
  </div>
  <py-script>
from pyodide import create_proxy

async def on_add_click(event):
    email = document.querySelector("#email")
    password = document.querySelector("#password")

    if email.value and password.value:
        token = await loop.run_until_complete(
            login(email.value, password.value, "admin")
        )
        print(token)
        if token is not None:
            if token != "Error logging in":
                p = document.getElementById("login-success")
                p.classList.replace("hidden", "visible")
                p = document.getElementById("login-failed")
                p.classList.replace("visible", "hidden")
                p = document.getElementById("login-form")
                p.classList.replace("visible", "hidden")
                return
        p = document.getElementById("login-failed")
        p.classList.replace("hidden", "visible")
        p = document.getElementById("login-success")
        p.classList.replace("visible", "hidden")


button = document.querySelector("button")
button.addEventListener("click", create_proxy(on_add_click))

# Run this using "asyncio"

import json
import urllib

from pyodide.http import pyfetch
from pyodide import JsException

async def login(email, password, scope):
    headers = {'Content-Type': 'application/x-www-form-urlencoded', 'accept': 'application/json'}
    body_dict = {"username": email, "password": password, "scope": scope, "grant_type": "", "client_id": "", "client_secret": ""}
    body = urllib.parse.urlencode(body_dict)
    try:
        response = await pyfetch(
            url="https://<MY_IP>/api/token/",
            method="POST",
            headers=headers,
            body=body
        )
        if response.ok:
            data = await response.json()
            return data.get("access_token")
    except JsException:
        return "Error logging in"
  </py-script>
</body>
</html>
Step 4: Start the FastAPI Service
I made sure my FastAPI service was running with the command:
$ sudo systemctl start taglink-api
Step 5: Test the Login Page
I was able to view my new login page my navigating to https://<MY_IP>/web/.
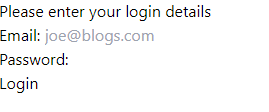
It wasn’t terribly pretty, but if I tried entering the user details for a user previously created for my FastAPI API and clicking ‘Login’, I got the message ‘Login successful!’, and if I inspected the Console, I could see my token printed there.

If I refreshed the page and tried logging in with an invalid password, I got the message ‘Login failed!’.
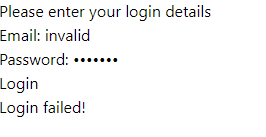
So all working as expected.
Conclusion
My login page is not very pretty and needs some refinement, but as a first foray into PyScript, I’m quite pleased with it. I will have to experiment some more and see what else I can do with it.
Thanks for reading!


Recent Comments